Ready to add sandblasted signs to your product arsenal?
We find that more and more sign shops that specialize in digitally printed graphics and RTA vinyl want to, and easily can, expand their product line by offering more sign types to their customer base. At Viscom, we have been producing wholesale sandblasted signs for quite some time now. It was one of the first sign types we offered. Over the past few months, many of our new partners have ask about how to design and sell sandblasted signs, so here is a quick overview.
One of the biggest “concerns” is that this type of sign is somehow more difficult to design and sell. But in reality, you are already familiar with creating vector type graphics for your customers, so you can use this talent to design sandblated signs (and other dimensional graphics) for them too. There are just a few things to take into consideration when designing these to get great results.
The sandblasting process
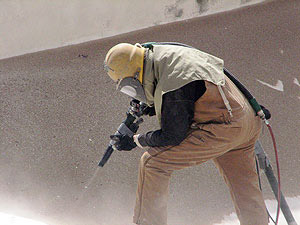
The actual process of sandblasting is a somewhat “messy” job. High pressure air combined with sand is blown at an object. If the object has a protective cover (rubber), the sand bounces off and has no effect. However, unprotected areas are subject to a very aggressive “erosion”. This process is used in removing rust from metal, like bridges before they get a new paint job. This mixture of air and sand is very effective at removing unwanted material. We use the sandblasting process to remove areas of a substrate to create awesome dimensional signage for your customers.
After receiving your design, we coat our substrate with a rubber “mask”. Your design is then cut into the rubber. Wherever we remove the rubber mask, the sandblast process eats away at the substrate and creates a recess. The areas of the substrate where the rubber is still intact, remains.
Once the sign is blasted, we remove any of the remaining rubber. We then contour cut the sign to shape and size, and prep it for the finishing paint job by sanding and sealing the substrate. Once complete, we package it and get it on its way back to you.
If you can use vector software to create files for cutting on a vinyl plotter, you can design and sell sandblasted signs to your customers. Just send us your design, we’ll take care of the messy part. Easy Peezy!
Below is some useful information for getting your sandblast on. If you have any questions, don’t hesitate contact us. We are here to help!
What are the size limitations?
When initially designing a sandblasted sign, you typically start by knowing your material size limitations. Back when we first started sandblasting signs, we used California clear redwood planks, cut them to size, pinned and glued them together, planed and sanded them, just to get the blank ready to create the final sign. The only nice thing about this process was that the planks were available in very long lengths so the material size limitation was minimal.
Today, it is very difficult and extremely expensive to attain redwood planks. So now we use either pre-made cedar blanks or even better, high density urethane blanks, or HDU for short. Even though cedar sign blanks are available, they are still quite expensive and as a result, 90% of the sandblasted signs we create for our partners now use HDU. The sandblasting process leaves a nice textured finish in the recessed areas. We can also incorporate a special technique that can simulate the look of wood, if desired.
We typically use 1″ and 1.5″ thick HDU which comes in standard sheet sizes including 4′ x 8′, 4′ x 10′ and 5′ x 10′.
2″ thick HDU is available in 4′ x 8′ sheets.
Keeping within these size limitations keeps your finished sign as one composite unit. We can, and have, made larger blanks by glueing different pieces together, but try to discourage this practice if at all possible. Very large sandblasted signs require internal structures for stability and the joining seams are very difficult to hide.
HDU has some great benefits over a natural wood product including…
– Completely waterproof
– Withstands extreme heat or cold
– Does not warp or bow
– Does not crack, rot or decompose
So, now-a-days, HDU is definitely the material of choice for your customers’ sandblasted project.
Design… where to start?
One of the nice things about designing a sandblasted sign is that there is virtually no limit as to its contour shape. Although round, oval, square and rectangular signs, are very common, with HDU sandblasted signs, you aren’t limited to those shapes.
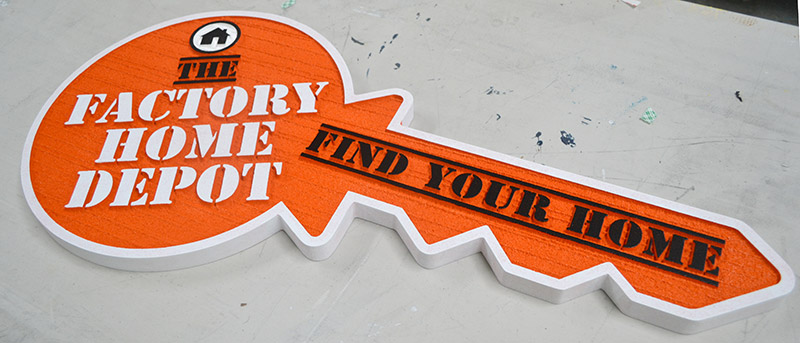
As you can see above, contour shapes can be easily incorporated into your design. This is an unusual (yet very cool) example, as most sandblasted signs we have made use more conventional shapes, like this one…
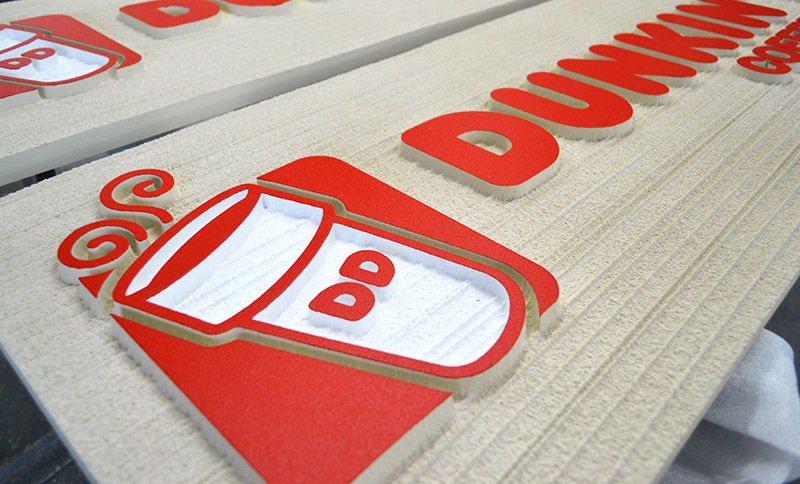
A quick note… sandblasted signs do not have to have raised boarders, where the background is sandblasted all the way to the edge of the sign. Sometimes this has its place, however, having done thousands of sandblasted signs, we recommend a raised outer boarder. In most situations they look better, and really define the contour of the sign. Again, not etched in stone, but highly recommended. Below you can see these signs have no boarder and are blasted all the way out to the edge of the sign. Due to the nature of the sandblasting process, you can see the slight variation in depth along the edge.
If you take a look in our sandblast sign gallery, you can see that the sky’s the limit when it comes to the contour shape of your customers’ sign. There is nothing wrong at all with round, oval, square or rectangular signs, we make lots of them. So you can always start from there when it meets your design goal. If you need something a little different and want to get started quicker, we have put together a library of a few contour shapes in various standard sizes to give you a great starting point for designing your sandblasted signs.

You can download these .ai files absolutely free below. The sign sizes listed in these files have been intentionally derived to maximize the use of the standard sheet sizes available. They are not etched in stone however, they minimize waste, and maximize value. All the shapes and sizes are are symmetrical, which comes in handy for double sided signs. Each of the 11 shapes above have a variety of sizes for that shape. Just add your logos and copy and you’ll be ready to present to your client and close that deal!
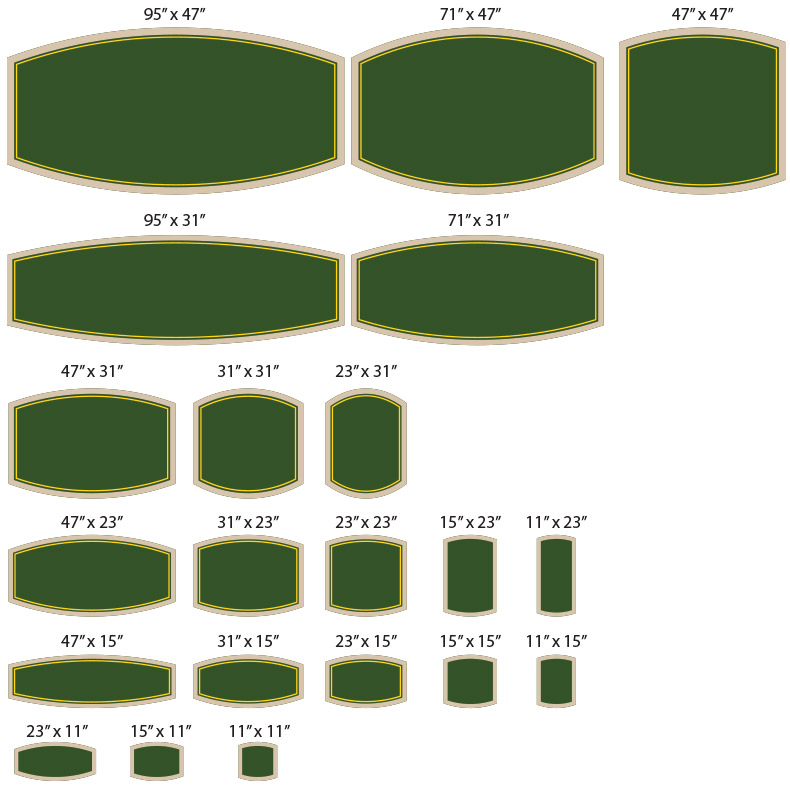
To use the sign shape files in your design, simply open the sign style file and select the size you want to use, then copy and paste it into a new file. This way your original files will be left in tact for you to use in the future. These files are vector files and can be used in your vector design software. We use Adobe Illustrator and these files are set up using layers. There are separate shapes for the background, outer boarder and inner boarder for each shape, so you can easily change the colors for your design. All included designs also have an inner boarder that can be removed if not needed.
Let’s do a thing!
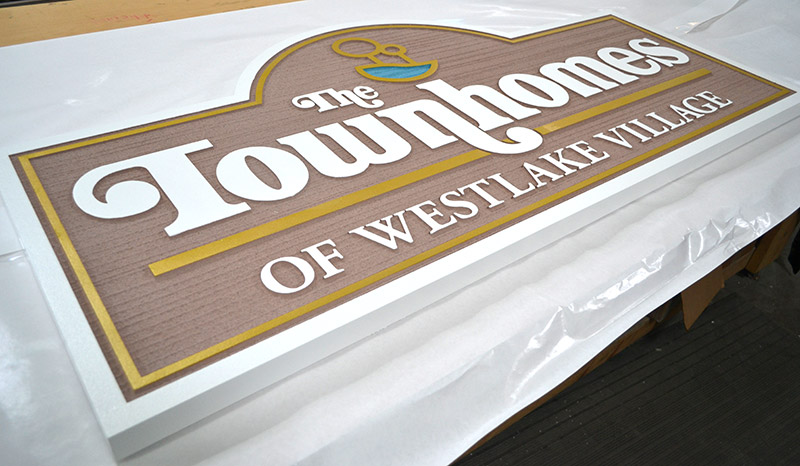
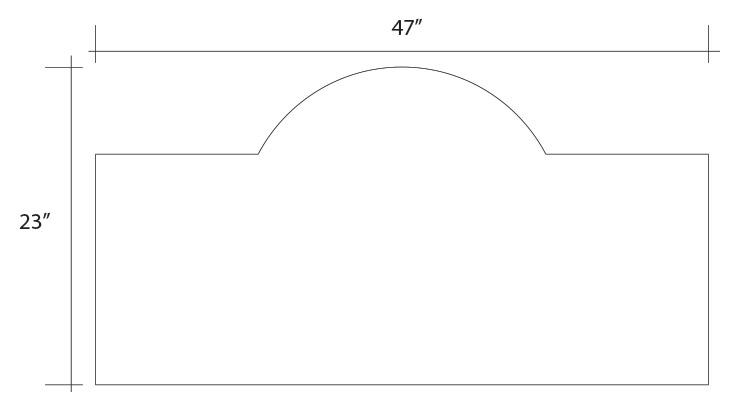
As an example, we are going to create the “Townhomes” sign shown above. So lets start with the contour shape and size of the sign.
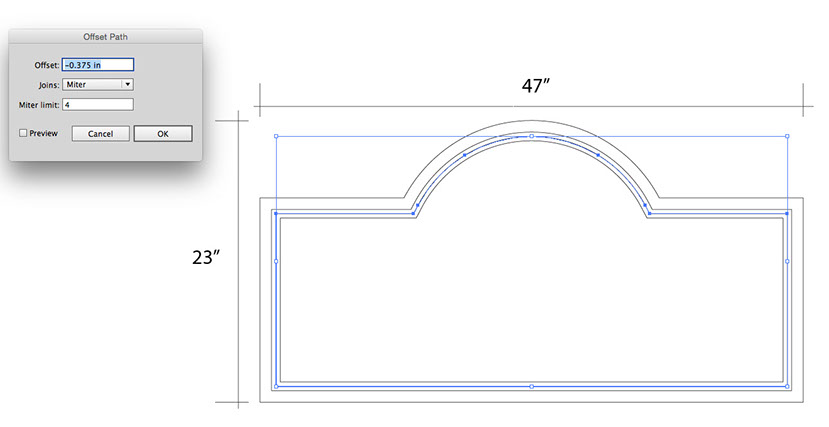
Next we are going to create the outer and inner boarders. You don’t have to have an inner boarder, but this design called for one. (Depending on the design, an inner boarder really adds a great accent and, bonus, it doesn’t cost any more to do this). So to add the outer and inner boarder, we simply IN-LINE the contour shape of the sign. In this example, the design called for a 1″ wide raised boarder, a 3/8″ recess and a 3/8″ raised inner boarder. In Adobe Illustrator, you select the shape and use the “Offset Path” command using a negative number to offset toward the inside of the shape. So we in-lined the outermost shape by 1″, then in-lined that shape by 3/8″ for the recess and then in-lined that shape at 3/8″ for the inner raised boarder. Easy enough…
Next you drop in your artwork. This is where your creativity and customers requirements come into play. However there are a few things to keep in mind. It is important to note that raised areas CAN NOT be less that 3/16″ of an inch wide. The reason for this is that what protects the raised area from being sandblasted away (like the background) is a thin sheet of computer cut rubber. During the actual sandblasting, there is a large amount of high pressure air mixed with sharp sand that is blown at the sign, in order to be able to erode the areas not protected with the rubber. The rubber has to have a certain amount of adhesion to the HDU for it to withstand the very aggressive sandblasting process. Shapes with a stroke of 3/16″ or less have a high probability of being “blown away” due to the lack of surface area and hence, adhesion. PLEASE KEEP THIS IN MIND WHEN DESIGNING YOUR SANDBLASTED SIGNS!

Should I stay or should I go?
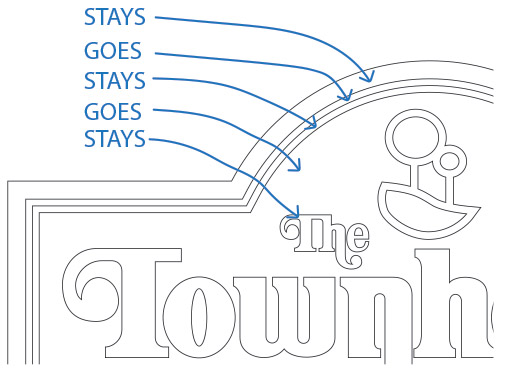
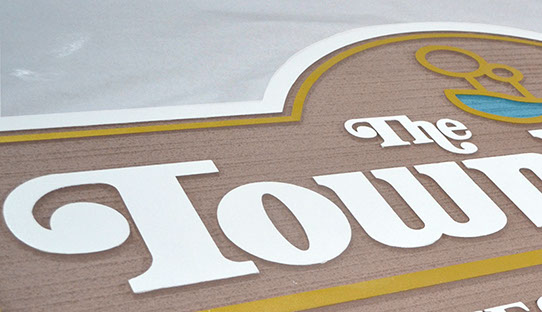
Which areas of the sign get blasted away (recessed) and which areas stay raised is determined by the presence of the rubber mask. Starting from the outermost boarder of the sign being raised (rubber stays), every new line in the design toggles a transition from raised to blasted and then back to raised then back to blasted, you get the idea. The diagram below shows how this works, as to if the rubber mask “STAYS” and “GOES”. You can see in the photo below how this actually turns out on the finished sign.
Letters and graphics can also be blasted (recessed) into the raised area of a sandblasted sign. For example, lets take the above artwork and recess the “OF WESTLAKE VILLAGE” copy into the lower area of the sign. We do this by simply raising the outer and inner boarders to accommodate the copy so now the copy will be blasted in to the lower raised boarder.
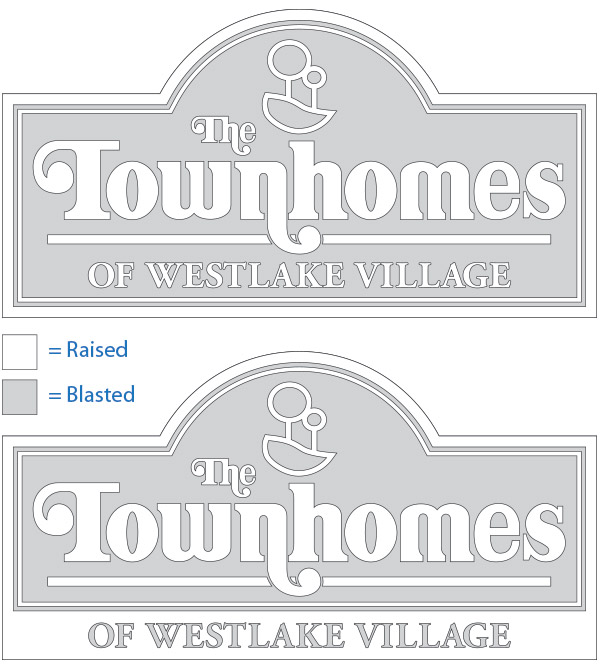
This little change in the height of the bottom boarder and blasting the copy into it, can make a big difference in the overall look of the sandblasted sign. You can use this area for addresses or telephone numbers, etc. Be creative, it’s all up to you.
What’s next?
There are a couple of other things to consider during the design phase (for sandblasted or any other kind of sign). For example, is the sign single or double sided, how thick should it be, how will the sign be mounted, ie, hanging from chains, on the face of a wall, on a post, between two posts, etc. Does the sign need an internal structure a simple backer or nothing at all?
No worries! We are happy to share our years experience with our partners. Once you have your initial design, we can help determine the best methods for producing a quality sign with great results. Don’t forget, we love making your signs, it’s what we do.
